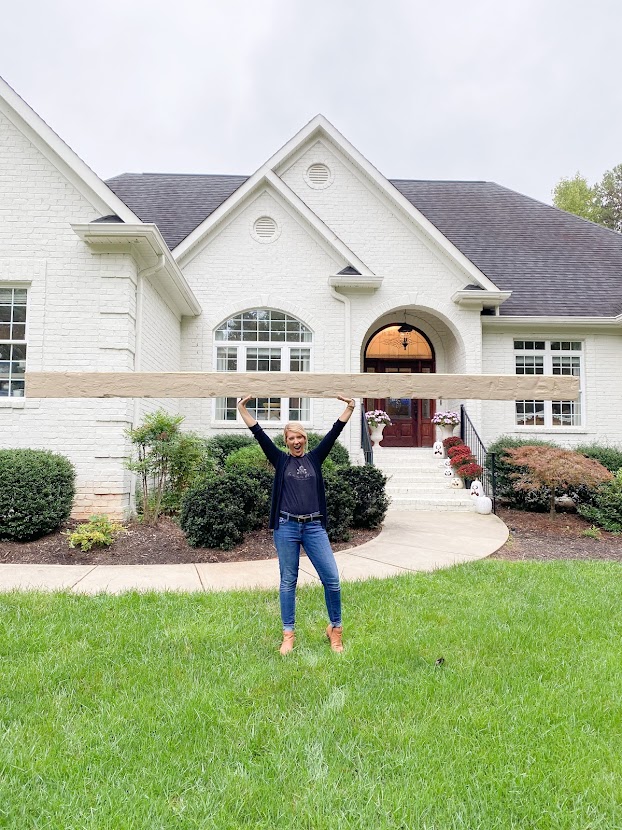
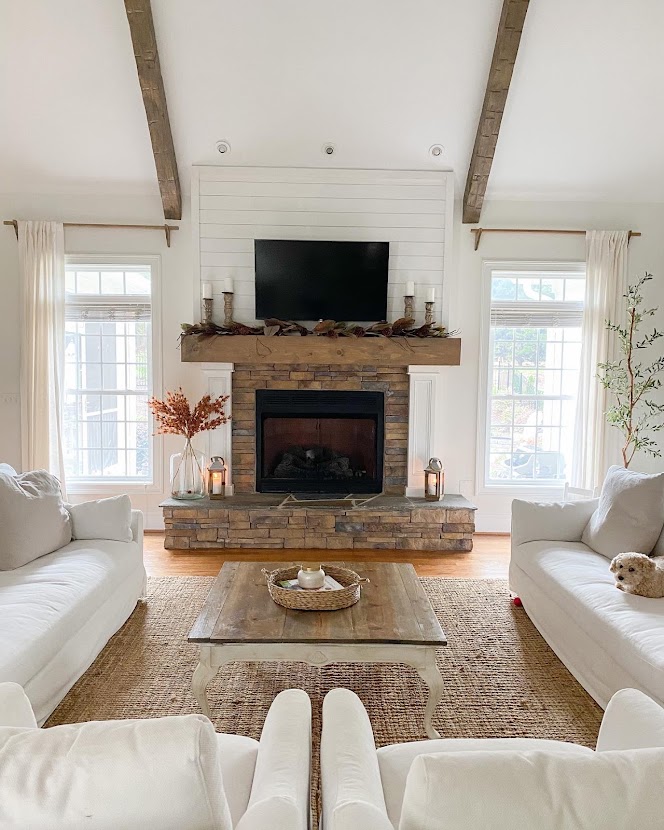
A few years back, I remember seeing a post from one of my all-time favorite bloggers and she posted a beautiful room in her home with wooden beams they installed on the ceiling. The beams were seriously unreal. Vintage, worn, rough around the edges. Everything I just instantly drool over! As I kept reading the blog post I literally stopped in my scroll so fast as I read over the words FAUX BEAMS. I could not believe it. I immediately hopped off that blog onto google and searched the company Fypon that created these beams. The more research I did, the more I was blow away at the concept this company created.
Fypon is a US based company that specializes in molded polyurethane millwork products. From vintage to modern design, Fypon offers the largest and most architecturally correct styles and designs of molding, trim, shutters and beams. Beams. Do you know how crazy that is? Foam Faux beams. Beams that are lightweight and easy to install, and wont warp, crack, rot or split like real wood. That concept solved all the problems I had with real beams; I knew I could never install real beams on my own. The weight of a real beam can actually do serious structural damage to your home inf it is not installed properly and that though scared me. Also, like everything I love the cost of a real beam is so steep. I actually had them quoted and the cost was in the 10,000-15,000 range just for a few to be installed. After reading about these faux beams, my mind was made that I wanted to install these beams in our home to truly see if it was truly as great of an idea as it seemed.
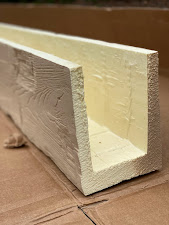
As I began the selection process on Fypon’s website( https://fypon.com/collections/beams) , I already knew I loved old, weathered beams that looked like they had been through a lot. Fypon has created different wood grained styles- Rough, Sawn, Hand Hewn, Mesa and Tahoe. They really accommodate for every style possible. When I saw Hand Hewn beams, I knew that was exactly the look I wanted for our French Country Farmhouse.
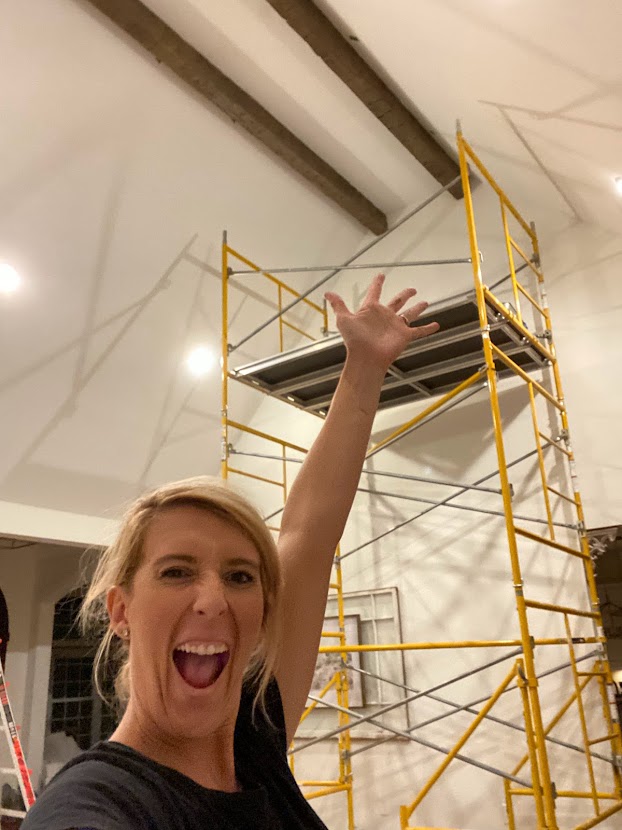
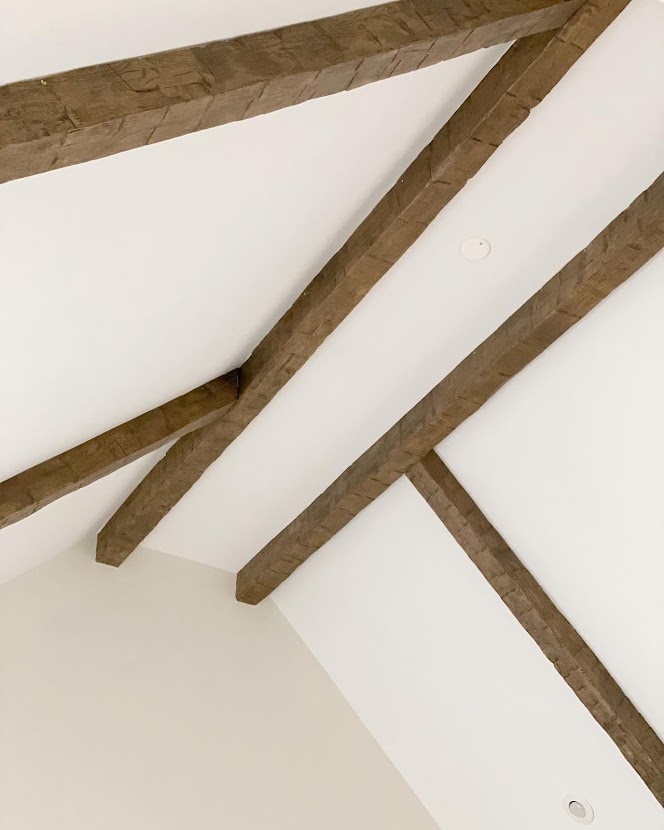
As I patiently awaited the arrival of our Fypon beams, I began studying installation and I couldn’t believe how easy it was! Now, keep in mind, I knew our scale project was not going to be quite so easy. I have actually never seen a ceiling like ours beamed, mainly because it has a flat peak with two seams(most have one seam at the peak). I knew to make our ceiling work, we needed two long beams down the center with 4 angled beams on the sides. With 20 foot angled ceilings, I knew the height was going to be our biggest challenge and I knew our angle cuts would be tricky. However, even with the most challenging aspects of our project, I knew installing these beams would be totally doable and I knew that I could lead this project! The beauty with this product is that you can design it based on your ceilings and order whatever size you need!
As a lady doing most of my project on my own, I knew this was something I could handle and I hope by reading this you will see that too! I most definitely needed help lifting in our scale of project, but the entire project was easy to accomplish myself. Adding beams in a smaller scale such as your bathrooms, laundry rooms, or kitchens this project could have been done completely by my own two hands and you know I love that!
Here’s what you need to have ready to begin your project
6 Hand Hewn beams (create a plan for your home and order whatever works for your design!)
Scaffolding (only needed for my high ceilings)
Stain (I used only 1 gallon of my beloved Antique Farmhouse Weathered Stain)
2x8x 8 boards cut at 4in in length (these will be your ceiling mounts)
3 in screws
3in Drywall toggles
Handsaw
Miter Saw Protractor for angled cuts (https://www.amazon.com/Smolder-Construction-Protractors-Woodworking-Metalworking/dp/B097JCPN93/ref=asc_df_B097JCPN93/?tag=hyprod-20&linkCode=df0&hvadid=532804498680&hvpos=&hvnetw=g&hvrand=9900659441671103018&hvpone=&hvptwo=&hvqmt=&hvdev=c&hvdvcmdl=&hvlocint=&hvlocphy=1021118&hvtargid=pla-1407371279926&psc=1)
Chalk line
Tape
Straight edge
Step 1: Whip those babies out of the box carefully and revel in their beauty! Seriously, I can’t get over how real they look!
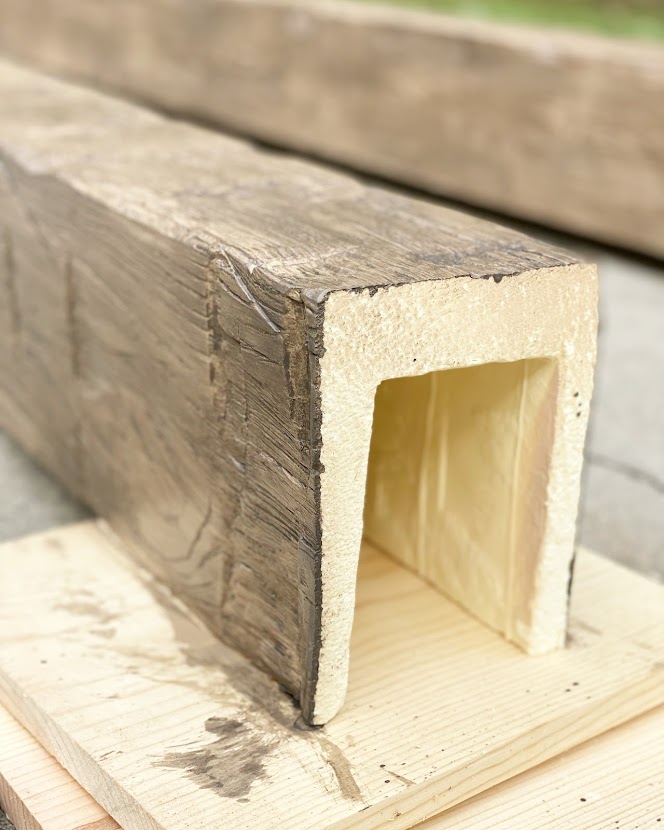
Step 2: Staining. Yep. You heard me. You can stain these bad boys in whatever stain works for your home. Now, you know I love sticking with one stain throughout the home so I chose the Antique Farmhouse to create consistency in the home. To begin the staining process, I laid the beams out on blocks of wood and used a 4 in brush to apply my stain in small areas. I went easy at first, applying stain and then wiping it completely off. You have to wedge your brush into the beam at times to coat in all the knooks and crannies. I completed one full coat and let it dry, then decided I wanted to go a little darker. For the next coat I left it on a little thicker and did not wipe as much to get the stain look, I was trying to achieve. In total, I did 2 coats of stain.
Step 3: Coating. Once the stain in dry you can coat and seal your beam with a protective layer. Since my beams are in my living room and I actually do not like the sheen of protective finishes (even matte) I chose to not coat my stain. I just love the dryness stain produces without the top coat. However, for durability the top coat is recommended.
Step 4: Mark on your ceiling where your beams will go. If you don’t have studs, no biggie! You will use toggle screws instead of wood screws. On the ceiling, in the inside of where your beam will be. You will need to mount boards to secure the beam to. Since the inside cavity of the beam was exactly 4 in wide, we used a 2x8x8 and cut it down into 4 inch pieces. We chalked a line where we wanted the edge of the beam to sit and we began installing these wood pieces so we could have something to attach the beam to. Fypon recommends spacing these every 8 or so inches. I was able to get everyone of the center beam supports to land on a stud. ***For every support you place, mark it on either side with tape so that when you put your beam on, you know where to screw into your stud.
Step 5: Measure two main beams for length. This tool is seriously a lifesaver and so accurate. https://tacklifetools.com/products/tacklife-laser-measure-164ft-m-in-ft-mute-laser-distance-meter-hd-50?utm_source=google&utm_medium=cpc&utm_campaign=Gobiu_SSC_US_Manual_All&gclid=EAIaIQobChMIq6D_3_fX8wIVjbfICh3xBg3bEAQYASABEgKkT_D_BwE
Step 6: Cut beams to length. Measure and mark. Measure and mark. Simply use a hand saw to cut your line and take your time to make sure you have a smooth straight cut. The only slightly scary thing about this project is that you really do need to cut accurately. For intense cutting projects like this, I always measure a tiny bit long and sand down if I need to. As we installed the first beam, it was a tad snug so we simply took it back down and sanded off the edge until it was tight. Easy Peasy.
Step 7: Mounting your beam. Simply hold the beam up to the ceiling, making sure your supports fit inside of your beam flush and screw your beam in place. Some of our supports were hard to wedge into our beam, we simply pulled the beam open a tad and pushed it right on. The tighter the support is to the beam the better it will hold! We screwed our beams in with 2-inch wood screws.
Step 8: Sit back and enjoy their beauty! Holy cow it is crazy how real they look!
Step 9: Time for the other 4 vertical beams. Mark your vertical beam location. First I tried to find all the studs and make my beams line up with them. Then I realized if I did that, our beams would be all out of wack and misaligned. I made the call to simply find where I wanted one beam and copy that in every beam location. For me, I measured 68’ off the wall and marked that spot everywhere I wanted a support for my beam. I knew this mark was where I wanted the center of my supports to land and began installation of all supports. I installed supports from the top of the beam line to the bottom, and once again make sure to mark with tape beside the supports so that when you put your beam on top of them you know where to screw.
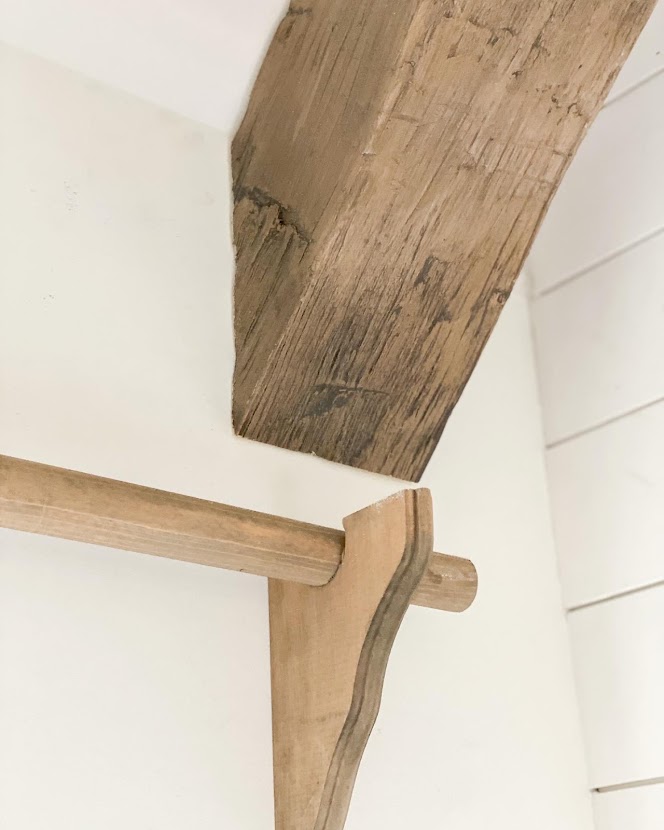
Step 10: Angle Cuts. Not quite my favorite, but again totally doable. The Miter Saw Protractor I attached above literally was a game changer for this. I used that protractor to find every angle and I made a practice piece that helped me make sure my beam was placed in the right position every time I cut. Heres what I mean by practice piece. (Photo) Our practice piece actually was the correct bottom cut for all four beams but each top of the beam was slightly different. I copied the cut where I could and used the protractor where I couldn’t. Make sure you’re cutting your beam on the right side and the right way each time. Use your hand saw to carefully cut at an angle. Dry fit the beams on the ceiling and sand down if needed for a tighter fit on ends.
Step 11: Mount vertical beams on to your ceiling supports and use wood screws to secure.
Step 12: Marvel that you saved a ton of money to install something that looks just like real wood!!
Make sure to check out our Instagram Highlight labeled “Fypon” to see video tutorials on this process!


Hi! Can you share the link to the antique farmhouse stain you used? Love!
Thanks so much.